Winter is just around the corner and with many HVAC units now being dual heating and cooling, it’s never been a more important time to ensure your unit is working at optimum efficiency.
Let’s face it, the last thing you need in the middle of winter is your workplace being without proper heating. Not only can it be bad for business, but it’s bad for the team – it is a health and safety requirement to maintain a comfortable temperature within the workplace. Similarly, the last thing you want to do is get through winter comfortably and realise when the warmer days arrive that your unit isn’t working.
So, whether you’re switching off the air conditioning for the colder months, or your unit is dual-action heating and cooling: ensuring the unit can withstand the winter months is paramount.
How? By making sure you have the right techniques when cleaning your unit, as incorrect cleaning and maintenance can soon lead to the need for professional repair – which we all know can add up.
Andrew Pinder, Founder of Pinder Cooling and Heating details expert cleaning techniques and what exactly to look out for when it comes to your air conditioning unit.
Inside cleaning
First things first; clean the inside components of your HVAC unit before moving onto the outside condenser.
Evaporator Coils
Evaporator coils are most frequently made of steel, copper or aluminium. The coils absorb warm air and hold the cooling refrigerant from the compressor. So, on warmer days the coil helps to remove warmth from the air by absorbing the heat. The opposite is true in winter. With a heat pump, the process reverses. This means the evaporator coil, rather than absorbing heat, expels it throughout your building.
As you can see, they play an important role in controlling your building’s temperature.
So where do you begin with cleaning them? Remove the access panel on your unit to locate the evaporator coil. Their location and appearance do vary between units, but there will be a door that will be screwed in place.
Once located, using a soft brush, remove dust from the coil. After dusting, you should clean the coils. To do this, the best method is to use a non-rinse coil cleaner. Spray this evenly over the coils. The residue and fall off from this will fall into the drain pan, which itself should be removed and simply cleaned with soap and water.
Reattach Access Panels
Once the evaporator coils and the drain pan are clean, your inside components are sorted. You can also wipe inside the unit around the components for extra protection, making sure there is not more dust or dirt – we’d always recommend doing more than less. From here, you can now reattach the access panel, screwing it back into place firmly.
Remember, this is a simple cleaning routine which should be conducted on a semi-regular basis, particularly before the winter months. However, if you come across any problems, it’s best to consult a professional for guidance.
Clean Air Filters
Air filters are one of the most important components designed to ensure your unit runs at maximum efficiency and quality, and thus your filters should be replaced or cleaned regularly.
Whilst some units require the replacement of filters, others require changing – always check your manual. If you are unsure how to remove a filter, refer to your manual. Many manuals have online versions on the manufacturer’s website if you don’t have a hard copy handy.
In terms of cleaning the filter, a vacuum is your friend. With a normal nozzle, vacuum in up and down motions, removing the dust particles until it appears clean, before soaking them in hot soapy water and rinsing off suds with a hose. Once dry, reinstall the filter.
Be careful: the filter can be easily damaged, so do not scrub or brush.
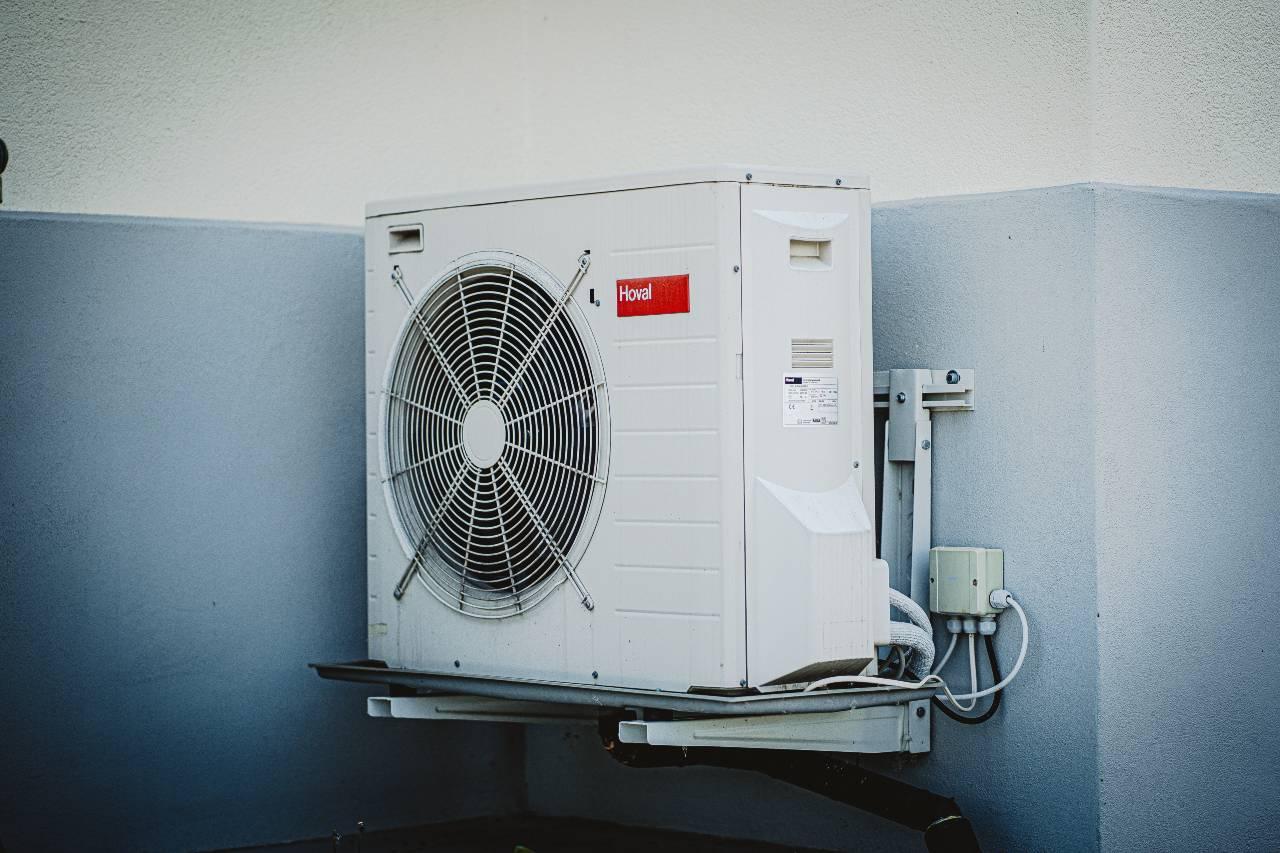
Outdoor Cleaning
Particularly with dual heating and cooling units, there is an outdoor component such as a condenser.
These also require regular maintenance, especially as they are exposed to a variety of particles and bacteria from outside.
Here’s how to get started.
Check for Winter Debris
With winter fast approaching, preparing your unit to withstand the winter months is imperative. As autumn comes to an end, leaves begin to fall, and this means there’s a higher chance of debris blocking your unit.
Ensure you regularly take a look at the grills and fans to ensure that debris such as these leaves aren’t collecting. If you spot things that aren’t quite right, it’s time to clean the condenser.
Remove any of the debris, such as leaves, grass, and dirt which may have found its way into the unit. Then, with a hosepipe, simply rinse away any remaining dirt on the unit until it appears clean.
Clean the Condenser Coil and Fins.
Condenser coils transfer the refrigerant from the gas back into a liquid so that they can begin the cycle again. The fins on the other hand help to keep hot and cool air separate.
The cleaning of these two components is therefore vital.
To begin, firstly remove the top and side panels from the unit, again remembering to keep the screws safe. Note: this step requires a soft hand approach as if the coils and fins are bent out of place it will create poorer airflow.
Next, using a coil cleaning solution, spray the coils thoroughly. With a hose, clean down the coils to wash away the solution and the dirt is removed – this should get the coils nice and clean easily. If they are still unclean, use a soft brush hoover attachment until clean.
For the fins, you first want to check if the fins are bent. If they are, they need to be straightened. The best way to do this is using a fin tool, which is essentially a fine-tooth comb designed the perfect size for the fins. Make sure your tool is the right size for your unit and the number of fins. With the right tool, this step is very easy. Simply comb the fins straight with a gentle hand.
Once you’ve done this, you can replace the panels.
Note: Before replacing the panels, inspect the unit to ensure there is no damage to the unit which can be harder to spot when unclean. If you find any damage, consult a professional.
Get your unit ready for winter
If you feel your unit is going to attract a lot of debris over the winter months, it may be wise to go to extra lengths to protect it.
You can cover the external unit with a plastic sheet to ensure no debris or excess water/ice makes its way to the unit. Whilst this isn’t a necessary step, all units are in different locations which means often, additional action will be needed.
Similarly, if your building is in a location that is prone to extreme coldness, insulating exposed pipes could be beneficial. This can be done by slotting foam pipes over the existing pipe, and coating it in an insulating layer for the colder seasons.
Final Tips
Complete a test run
It’s important that after you’ve carried out maintenance to your unit, you complete a test run.
Test runs are a fantastic way to obtain peace of mind that everything is back in working order. HVAC units can be complicated, and whilst cleaning can be a simple process, it can be easy to knock something out of place or come across unforeseen issues.
Always check your work is completed before leaving your unit to do its job in your building.
Know when to consult a professional
Whilst your unit is easy to clean and maintain (once you know how!), it is a specialist piece of equipment that is both technical and often expensive.
You can save time and money in the long run by carrying out regular checks, cleaning, and light maintenance yourself. But when something seems wrong you must call a professional in to help as soon as you spot an issue. A small problem caught quickly is an easier fix than a big problem left too late, especially in these colder months, when the weather isn’t always on our side.
Always remember…
Before starting any maintenance or cleaning for your HVAC unit, make sure you turn the unit off and cut off the power supply to the unit. This is a necessary safety precaution.
Take our Air Conditioning or Commercial Refrigeration Healthcheck to see how healthy your equipment is, and to see if it’s due a maintenance check.